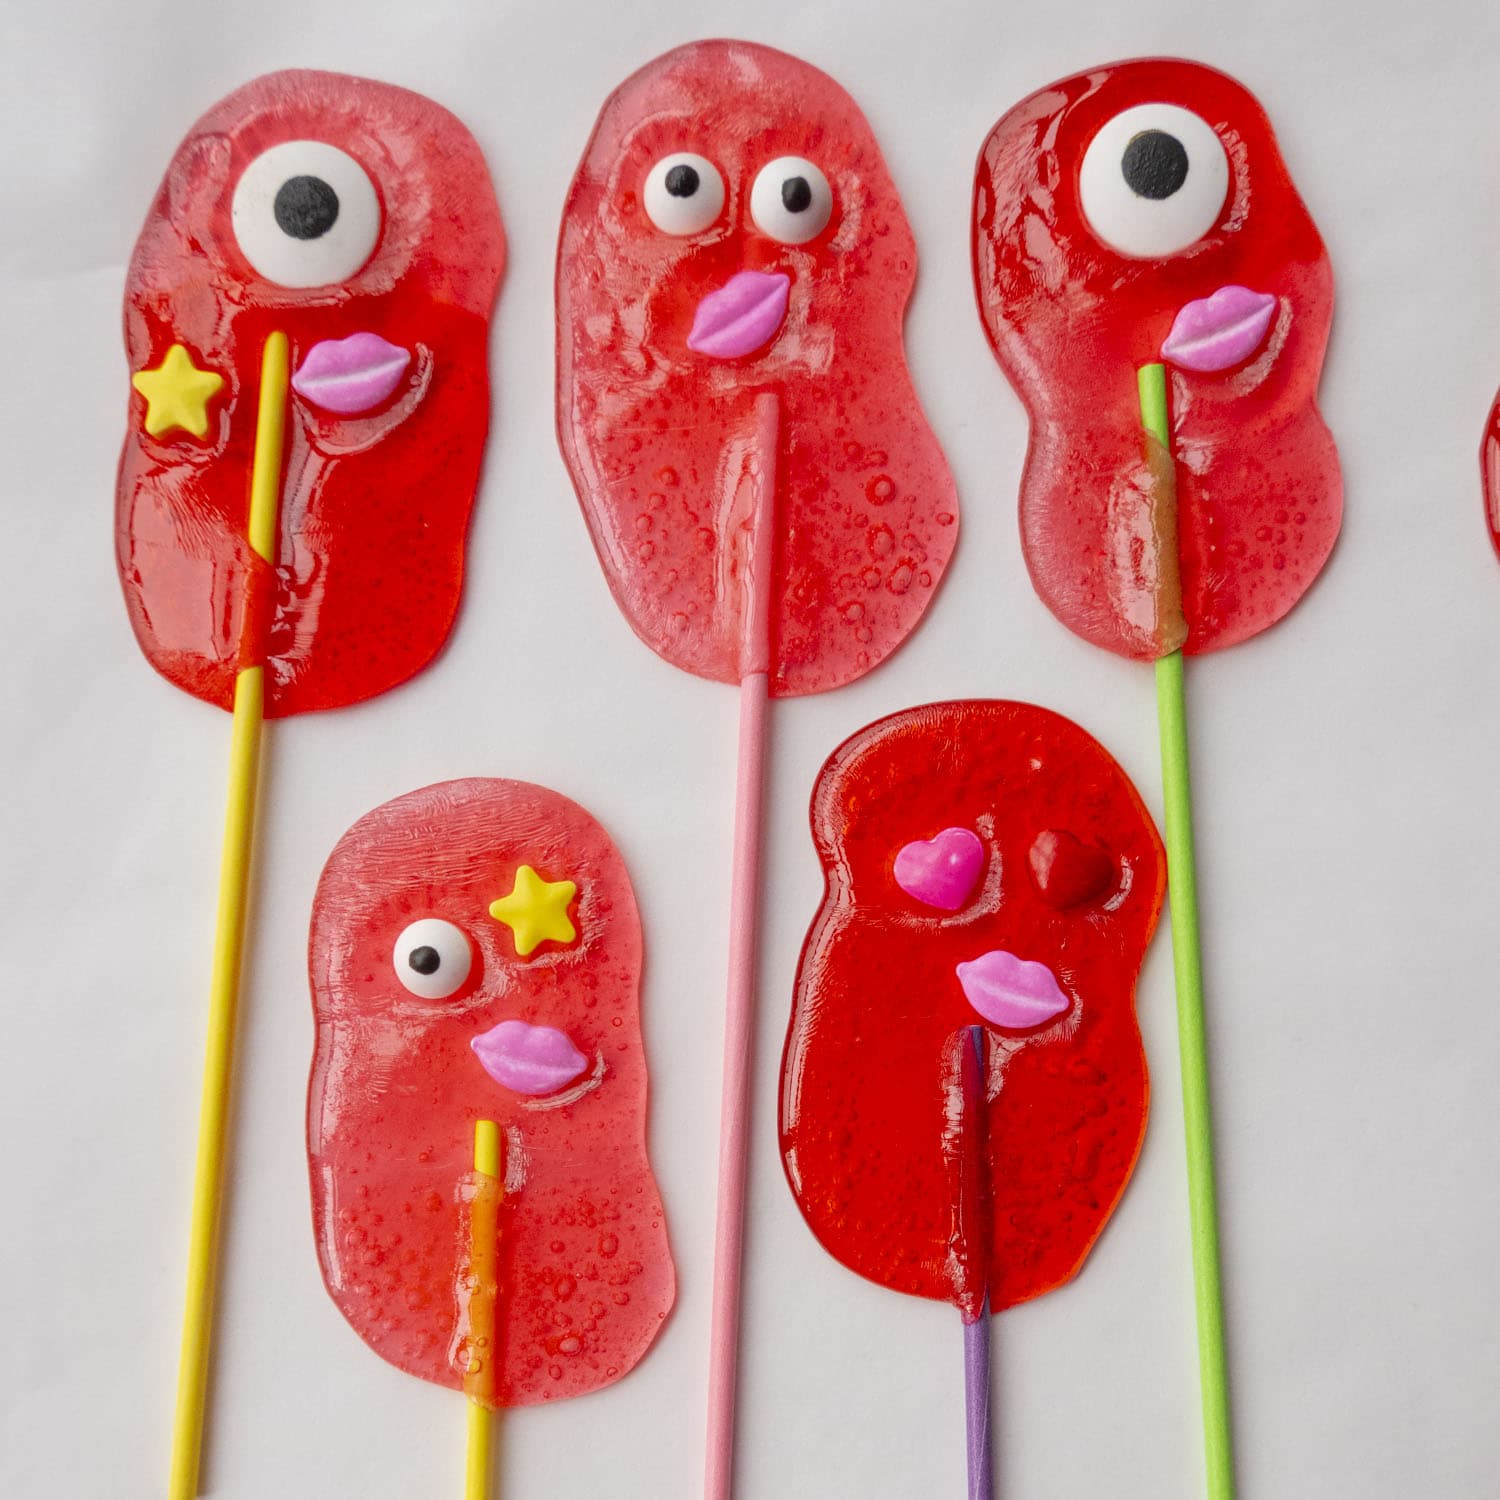
Unleash Your Inner Sweetheart: Crafting Adorable Valentine Monster Lollipops with Jolly Ranchers
Valentine's Day is a time for sharing love, and what better way to do it than with a homemade, whimsical treat? Forget the generic store-bought candies this year and dive into the delightful world of crafting your very own valentine monster lollipops jolly rancher lollipops! These charming, vibrant suckers, made from melted Jolly Ranchers, are not only incredibly fun and easy to make but also offer a personal touch that will melt hearts faster than a Jolly Rancher in a warm oven.
Perfect for little hands to help with (under supervision, of course!), these monster lollipops are a fantastic activity for families looking to create lasting holiday memories. Imagine the joy on your children's faces as they watch the hard candies transform into glossy, colorful discs, ready to be adorned with candy eyeballs and sprinkles. They're an absolute showstopper for classroom parties, a unique gift for friends, or simply a sweet surprise for family members. Get ready to create a batch of homemade lollipops that are guaranteed to be a monstrous hit!
Why Jolly Ranchers Are Your Secret Weapon for Valentine's Day Treats
When it comes to crafting vibrant, eye-catching lollipops, Jolly Ranchers are truly a game-changer. Their hard candy composition and brilliant, consistent colors make them ideal for melting into perfect, glossy discs. Unlike other candies, Jolly Ranchers maintain their intense hue even when melted, ensuring your valentine monster lollipops jolly rancher lollipops pop with festive cheer.
The beauty of using Jolly Ranchers extends beyond their color. They melt smoothly and uniformly, creating a lollipop base that's easy to work with. Plus, with a variety of red and pink flavors readily available – cherry, watermelon, strawberry, or even a mix – you can easily stick to a Valentine's theme or experiment with a rainbow of colors for a diverse monster squad. This simplicity and versatility make them a dream ingredient for both novice and experienced candy makers.
The kid-friendly aspect is another huge plus. Little ones adore sorting the candies, arranging them on the baking sheet, and especially the decorating phase. It's a fantastic way to involve them in the kitchen, fostering creativity and fine motor skills. These treats are particularly popular for school exchanges and parties. For more ideas on how to make these delightful candies a hit for your child's next event, check out our guide on Easy Jolly Rancher Monster Lollipops for Classroom Parties & Gifting.
Gathering Your Ghoulish Goodies: What You'll Need
Before you begin your candy-making adventure, ensure you have all your supplies ready. Speed is key when working with melted candy, so having everything laid out will make the process much smoother.
Ingredients:
- Jolly Rancher Hard Candies: Approximately 3 candies per lollipop. We recommend red, pink, or purple for Valentine's Day, but any colors work!
- Lollipop Sticks: Standard 4-6 inch paper or plastic sticks.
- Candy Eyeballs: Various sizes add character to your monster faces.
- Sprinkles: Red, pink, white, or colorful sprinkles for extra flair. Heart-shaped sprinkles are especially festive!
- Optional: Small candy hearts, edible glitter, mini chocolate chips, or edible marker pens for drawing mouths.
Equipment:
- Baking Sheet: A standard cookie sheet will do.
- Parchment Paper or Silicone Baking Mat: Absolutely crucial for non-stick results and easy cleanup. Do NOT skip this step!
- Oven: Preheat to approximately 275-300°F (135-150°C).
- Small Tongs or Tweezers: Helpful for precise placement of decorations.
- Clear Treat Bags & Twist Ties: For gifting or individual packaging.
Crafting Your Sweet Little Monsters: A Step-by-Step Guide
Ready to transform humble Jolly Ranchers into spectacular valentine monster lollipops? Follow these steps closely for the best results!
Preparation is Key
- Preheat Your Oven: Set your oven to 275-300°F (135-150°C). A lower temperature is often better as it melts the candy more slowly and evenly, reducing the risk of burning.
- Line Your Baking Sheet: Cover your baking sheet completely with parchment paper or a silicone baking mat. This is arguably the most important step for easy removal and cleanup.
- Arrange Your Candies: Place 3 Jolly Ranchers together on the lined baking sheet, ensuring they are touching. They will expand as they melt, so leave at least 2 inches of space between each cluster of candies.
- Set Up Your Decorating Station: This is vital! Have your lollipop sticks, candy eyeballs, sprinkles, and any other decorations already opened and within arm's reach. You'll need to work incredibly fast once the candies come out of the oven. Some pro bakers even pre-design their monster faces on a separate plate so they can quickly transfer them.
The Melt Down
Once your oven is preheated and candies are arranged, it's time for the magic to happen!
- Bake Until Melted: Place the baking sheet in the preheated oven. Bake for approximately 5-8 minutes. This part requires your undivided attention! You need to watch the Jolly Ranchers *very closely*. They will start to soften, spread, and become glossy. The moment they have fully melted into a cohesive, flat disc with smooth edges, they are ready. Do not overbake, or they will spread too thin, bubble excessively, and potentially burn, turning into one big, unmanageable blob monster (trust us, we've seen it happen!).
Stick It To 'Em!
Timing is everything for this step!
- Immediately Add Lollipop Sticks: As soon as you pull the baking sheet from the oven, quickly but gently press a lollipop stick into the bottom of each melted Jolly Rancher disc. Rotate the stick slightly to ensure it's fully embedded and the candy wraps around it a little. The candy will start to harden almost instantly, so you literally have seconds to do this before it sets too much.
Bringing Monsters to Life
This is where your creativity truly shines!
- Decorate with Speed: While the candy is still warm and tacky, but *before* it fully hardens, quickly place your candy eyeballs, sprinkles, and any other desired decorations onto the surface. The residual heat will help the decorations adhere. If the candy has hardened too much, you can try dabbing a tiny bit of corn syrup or edible glue on the back of heavier decorations, but working quickly while the candy is warm is best.
Cooling & Curing
Patience is a virtue, especially when waiting for delicious treats!
- Allow to Cool Completely: Let the Jolly Rancher lollipops cool and harden on the parchment-lined baking sheet for at least 30-60 minutes at room temperature. For best results, especially if you plan on bagging them, allow them to set for a full hour to ensure they are completely firm and won't stick together.
- Package (Optional): Once fully cooled, carefully peel the monster lollipops from the parchment paper. They should come off easily. Place them into clear treat bags and secure with twist ties if you're gifting them or bringing them to a party.
Beyond February 14th: Monster Lollipops for Every Occasion
While these whimsical lollipops are perfect as valentine monster lollipops jolly rancher lollipops, their charm isn't limited to just one holiday! The versatility of this recipe means you can transform them into a year-round treat for any celebration or just a fun weekend activity.
Simply swap out your color scheme! For Halloween, think green, purple, and black Jolly Ranchers for spooky monsters. Christmas calls for festive red and green, perhaps with some crushed candy cane sprinkles. Birthdays? Use a mix of all the colors for vibrant, rainbow monster lollipops that are sure to delight. You can even experiment with different candy eye sizes and sprinkle shapes to match various themes. Discover more creative ideas for adapting this fun recipe in our article, Beyond Valentine's: Crafting Jolly Rancher Monster Lollipops Year-Round.
Troubleshooting & Pro Tips for Perfect Monster Lollipops
- Don't Overbake: The number one mistake! Watch them like a hawk. Overbaking leads to bubbles, burnt sugar flavor, and an unmanageable mess.
- Work Fast: Have everything ready. From placing the sticks to decorating, the window of opportunity is small.
- Parchment Paper is Non-Negotiable: Seriously, don't try foil or just greasing the pan. You'll regret it.
- Experiment with Sizes: While 3 Jolly Ranchers give a good-sized lollipop, you can try 2 for smaller treats or 4 for larger ones, adjusting baking time slightly.
- Storage: Once cooled and bagged, store your lollipops in an airtight container at room temperature. They can last for several weeks, though they're usually devoured much faster!
- Making Ahead: These lollipops are perfect for making a day or two in advance, especially for parties. Just ensure they are completely hardened and properly bagged before storing.
Conclusion
Crafting valentine monster lollipops jolly rancher lollipops is more than just making a sweet treat; it's about creating joyful memories and sharing a little bit of homemade love. These easy, vibrant, and incredibly fun lollipops are a delightful project for all ages, offering a perfect blend of creativity and deliciousness. Whether you're making them for classroom exchanges, gifting to loved ones, or simply enjoying a festive family activity, these charming candy monsters are sure to bring smiles and sweetness to your Valentine's Day celebrations. So, gather your Jolly Ranchers, unleash your imagination, and get ready to create some truly adorable, edible monsters!
