Beyond Valentine's: Crafting Jolly Rancher Monster Lollipops Year-Round
While the charming allure of
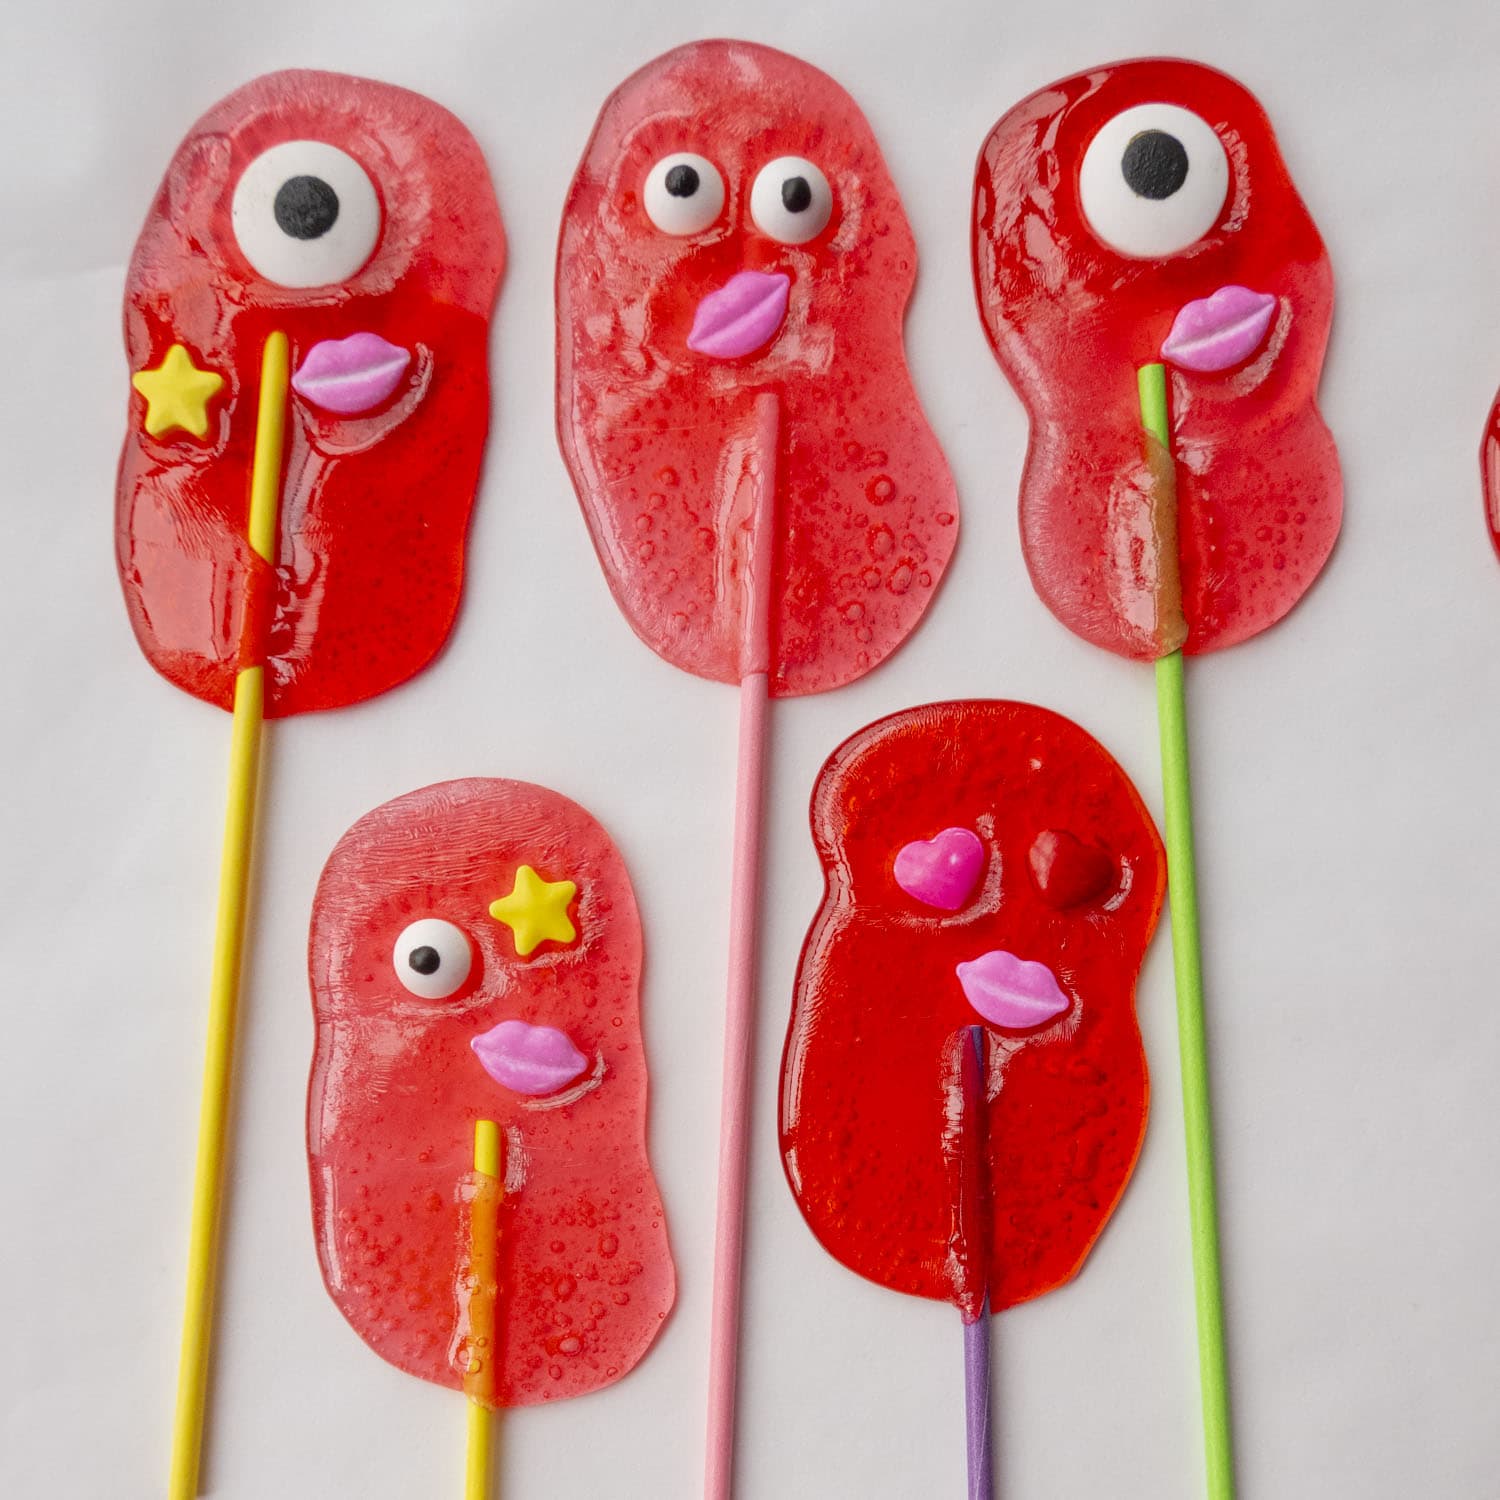
Make Adorable Monster Lollipops for Valentine's Day with Jolly Ranchers often brings to mind hearts and Cupid, there's a particular sweet treat that effortlessly transcends seasonal boundaries: the delightful Jolly Rancher monster lollipop. These vibrant, customizable candy creations, often associated with Valentine's Day, are far too fun and easy to relegate to just one holiday. Imagine transforming simple Jolly Rancher candies into adorable (or spooky, or silly!) monster faces on a stick, perfect for birthdays, Halloween, or just a Tuesday afternoon pick-me-up. This comprehensive guide will show you how to master the art of making these captivating
Easy Jolly Rancher Monster Lollipops for Classroom Parties & Gifting, ensuring your candy cupboard is always stocked with creativity, whether you're aiming for traditional
valentine monster lollipops Jolly Rancher lollipops or something entirely unique.
The Irresistible Charm of Homemade Monster Lollipops
There's something inherently magical about crafting your own treats, and Jolly Rancher monster lollipops are no exception. They combine the vibrant, tangy flavor of everyone's favorite hard candy with the endless possibilities of creative decoration. This isn't just a recipe; it's an activity, a tradition, and a delightful way to inject personalized sweetness into any occasion.
Why Homemade is Always Best
Opting for homemade monster lollipops over store-bought alternatives offers several distinct advantages. Firstly, there's the satisfaction of creation. Watching colorful Jolly Ranchers melt and transform into a glossy canvas for edible art is incredibly rewarding. Secondly, these lollipops are incredibly cost-effective, turning a handful of inexpensive candies into a batch of impressive treats. Finally, and perhaps most importantly, they offer unparalleled customization. You choose the colors, the flavors, and the monster expressions, ensuring each lollipop is a unique reflection of your imagination. This makes them perfect for tailoring to specific party themes, school colors, or individual preferences, far beyond the standard Valentine's assortment.
Kid-Friendly Fun for All Ages
One of the greatest appeals of crafting
Jolly Rancher lollipops is their accessibility for little hands. While the melting process requires adult supervision, children can be instrumental in the fun parts: arranging the Jolly Ranchers on the baking sheet and, most excitedly, decorating the cooling lollipops with candy eyeballs and sprinkles. This hands-on experience not only fosters creativity but also builds cherished family memories. Starting with "Heart Toast" for Valentine's breakfast and then moving on to making a yearly batch of these monster treats, as some families do, turns a simple holiday into a full day of delicious traditions. Kids absolutely adore watching the candies melt and then bringing their monster creations to life, making them a huge hit for classroom parties, gifting to friends, or just a fun weekend activity.
Your Step-by-Step Guide to Crafting Monster Masterpieces
The process of making these captivating monster lollipops is surprisingly straightforward, though it does require a bit of speed and preparation. Follow these steps to ensure your Jolly Rancher creations turn out perfectly every time.
Essential Supplies You'll Need
Before you even preheat your oven, gather all your ingredients and tools. Preparation is key to success, especially given how quickly the melted candy sets.
*
Jolly Rancher Hard Candies: An assortment of colors and flavors. For traditional
valentine monster lollipops, red, pink, and white are perfect. For year-round fun, grab a rainbow!
*
Lollipop Sticks: Standard paper or plastic lollipop sticks, readily available at craft stores or online.
*
Parchment Paper: Absolutely crucial for preventing sticking and ensuring easy cleanup. Avoid wax paper, as it can melt or stick to the candy.
*
Baking Sheet: A sturdy, flat baking sheet.
*
Candy Eyeballs: These are the stars of your monster faces! Keep various sizes on hand for different expressions.
*
Sprinkles: An array of colorful sprinkles, jimmies, nonpareils, or edible glitter to add texture and personality.
*
Optional: Clear treat bags and twist ties for gifting or storage.
The Melting Process: A Delicate Art
This is where the magic truly begins, but it's also where precision and vigilance are paramount.
1.
Prepare Your Station: Line your baking sheet *generously* with parchment paper. This step cannot be overstated for hassle-free lollipop removal.
2.
Arrange the Candies: For each lollipop, place three Jolly Ranchers together, ensuring they are touching. This allows them to melt into a single, cohesive disc. Leave about two inches of space between each cluster of candies, as they will expand significantly. For larger lollipops, you might use four candies, but three is ideal for most standard lollipop sticks.
3.
Heat Things Up: Preheat your oven to a low temperature, typically around 275-300°F (135-150°C). This gentle heat ensures a slow, controlled melt, minimizing the risk of burning.
4.
Watch Like a Hawk: Bake the Jolly Ranchers for approximately 5-8 minutes. *This is the most critical part!* You need to watch them incredibly closely. They should melt into glossy, slightly bubbly, flat discs. If left too long, they can over-spread and become one large, unusable "blob monster," as many experienced crafters can attest! Remove the tray from the oven as soon as they are fully melted and appear glossy.
5.
Insert Sticks: Immediately after removing from the oven, press a lollipop stick firmly into the bottom of each melted candy disc, twisting slightly to ensure it's securely embedded. Do this swiftly but carefully.
The Art of Decorating: Unleashing Your Inner Monster Creator
Once the sticks are in, it's a race against time before the candy hardens!
1.
Speed is Key: With your lollipop sticks in place, quickly grab your pre-arranged candy eyeballs and sprinkles. Have them laid out on a plate or in small bowls right next to your baking sheet.
2.
Apply Decorations: While the candy is still warm and pliable, press two candy eyeballs onto each disc to create the monster's eyes. Then, sprinkle generously with your chosen sprinkles, creating hair, mouths, or unique textures. Don't be afraid to experiment with different combinations! Some might have one giant eye, others three, or even just a mouth of jagged sprinkles.
3.
Cool Down: Allow the decorated lollipops to cool completely on the baking sheet for at least 30 minutes, or even an hour if you plan on bagging them. They will harden as they cool. Once fully set, they will easily peel off the parchment paper.
Beyond Valentine's: Seasonal & Themed Monster Lollipops
The true beauty of these
Jolly Rancher lollipops lies in their incredible versatility. While they shine brightly as
valentine monster lollipops, their potential for year-round fun is limitless. Simply swap out your Jolly Rancher colors and sprinkle choices to match any theme or season.
Birthday Bash Monsters
Planning a birthday party? Choose Jolly Ranchers that match the party's color scheme! For a vibrant, festive look, use all the colors of the rainbow. Imagine multi-colored monster lollipops as party favors, each one unique. They're a fantastic, personalized alternative to traditional candy bags. You could even challenge kids to create a monster that represents the birthday child's favorite animal or character.
Spooky Halloween Treats
When October rolls around, transform your monster lollipops into ghoulish delights! Use green (apple), purple (grape), orange (orange), and black (cherry or blue raspberry with food coloring if brave!) Jolly Ranchers. Decorate with black and orange sprinkles, spooky bat or ghost shapes, and perhaps even some edible glitter for an eerie shimmer. These are perfect for trick-or-treaters or a haunted house party.
Festive Holiday Fun
The holidays offer another perfect opportunity. For Christmas, use red (cherry) and green (apple) Jolly Ranchers, decorating with red and green sprinkles, or even tiny edible silver balls. For patriotic holidays, red, white (clear or mixed with white food coloring), and blue Jolly Ranchers create a festive treat. The possibilities are truly endless, making these homemade lollipops a staple for any celebration.
Troubleshooting & Pro Tips for Perfect Lollipops
Even though making monster lollipops is relatively easy, a few tips can elevate your candy-making game and help you avoid common pitfalls.
Speed is Your Ally
We’ve mentioned it before, but it bears repeating: once the Jolly Ranchers are out of the oven, you have a very narrow window before they begin to set. Sugar cools and hardens quickly. Ensure all your decorations are open, arranged, and within arm's reach. Work systematically, placing sticks and then decorating each lollipop in quick succession. If a lollipop starts to harden before you've finished decorating, sometimes a few seconds in a warm (but not hot) oven can briefly soften it, but it's best to work quickly the first time.
Storage and Gifting
Once your monster lollipops are completely cool and hard, they can be stored in an airtight container at room temperature for several weeks. Avoid refrigeration, as this can introduce moisture and make them sticky. If you're planning to gift them, allow them to set for at least an hour to ensure they are fully firm. Then, individually wrap each lollipop in a clear treat bag, securing it with a twist tie or a pretty ribbon. Adding a small, custom-made tag can add an extra special touch, making them ideal for classroom exchanges, party favors, or just a thoughtful gift for friends and family.
Crafting Jolly Rancher monster lollipops is a delightful journey into the world of homemade candy. From the simple act of melting hard candies to the imaginative flourish of decorating, every step is infused with fun and creativity. While they hold a special place as
valentine monster lollipops, their incredible adaptability makes them a fantastic year-round treat. So, gather your Jolly Ranchers, unleash your inner monster artist, and get ready to create some truly unforgettable, edible masterpieces that are sure to bring smiles to faces, no matter the season.